
Why do that?
I have my server at home, which contains multiple hard-drives with all my data on them in RAID configuration. I have my way to access this server remotely from any where in the world, but in order to access the server, it has to be turned on! So the problem is: How do I turn my server when I need it?
This whole thing took me like 4 hours of work. It turns out it’s much easier than it looks like.
Why is keeping the server turned on all the time a bad idea?
Of course, a web-server can be left turned on all the time to be accessed from everywhere at any time, but a server that is used to store data… I don’t see why one would turn it on unless one needs something from it. In fact, I see the following disadvantages in keeping the server on all the time and benefits for being able to turn it on remotely:
- High power consumption… although the server I use is low-power, but why use 150 W all the time with no real benefit?
- Reduction of the server life-span, components like the processor has a mean life-time that will be consumed by continuous operation.
- Fans wear out and become noisier when used for longer times.
- What if the server froze? I should be able to restart it remotely.
What do you need to pull this off?
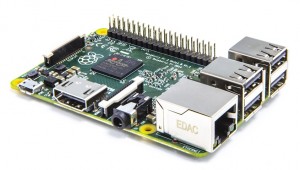
- Raspberry Pi (1 or 2, doesn’t matter, but I’ll be discussing 2)
- 5 Volts Relay. I use a 4 Channel relay module. It costs like $7 on eBay or Amazon depending on how many channels you need.

- Jumper cables (female-female specifically if you’re using Raspberry Pi + a similar Relay Module) to connect the Raspberry Pi to the Relay Module

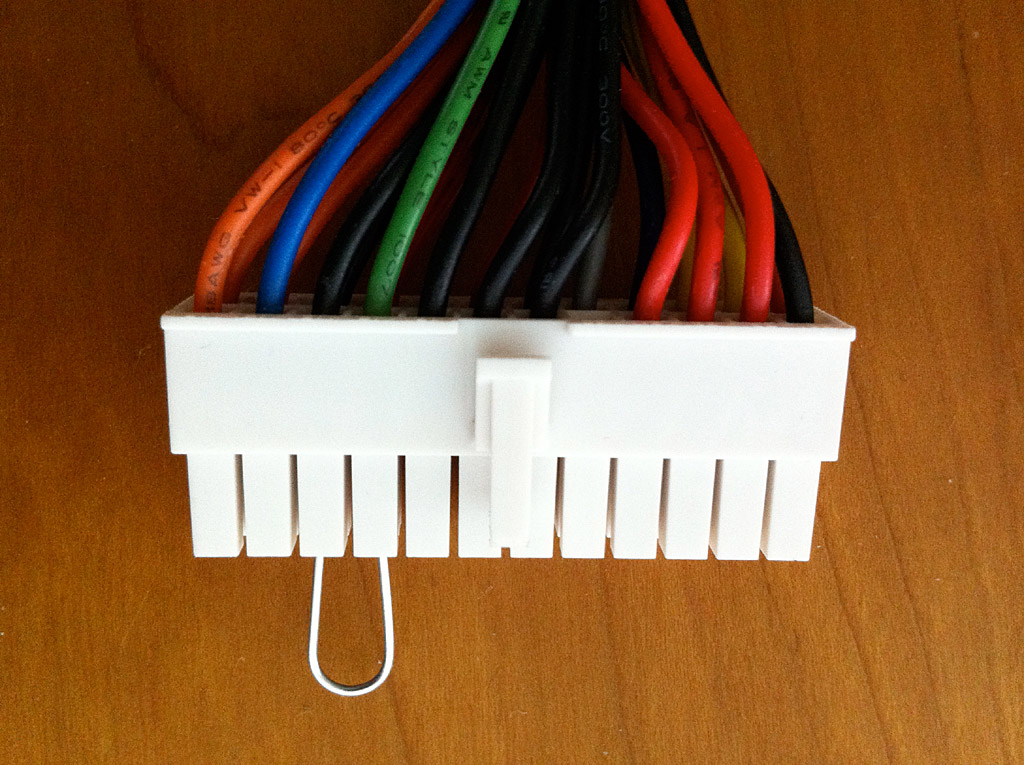
- More wires and connectors to connect the server to the Raspberry Pi cleanly, without having a permanent long cord permanently connected to the server. I used scrap Molex 4-pin connectors:

I cut a similar connector in half and used one part as a permanent connector to the server, and the other part went to the wire that goes to the Relay Module.
- Finally, you need some expertise in Linux and SSH access as the operating system I use on my Raspberry Pi is Raspbian. This I can’t teach here, unfortunately, as it’s an extensive topic. Please learn how to access Raspberry Pi using SSH and how to install Raspbian. There are tons of tutorials for that online on the Raspbian and Raspberry websites that teach it extensively. If you’re using Windows on your laptop/desktop to SSH to the Raspberry Pi, you can use Putty as an SSH client.
Once you’re in the terminal of your Raspberry Pi, you’re ready to go!
How control is done using Raspberry Pi:
If you already know how to control Raspberry Pi 2 GPIO pins, you can skip this section.
On Raspberry Pi 2, there is a set of 40 pins that contain 26 pins that are called GPIO (General Purpose Input/Output) pins. GPIO pins can be controlled from the operating system of Raspberry Pi. I use Raspbian as an operating system of my Raspberry Pi 2 and the Python scripting language. In Raspbian, python is pre-equipped with what’s necessary to start controlling GPIO pins very easily.
Why Python? Because it’s super-easy and is very popular (it took me a few days to become very familiar with everything in that language… yes, it’s that simple). Feel free to use anything else you find convenient for you. However, I provide here only Python scripts.
The following is a map of these pins:

And the following is a video where I used them to control my 4-channel Relay Module:
Note 1: Be aware that indentation matters in Python for each line (that’s how you identify scopes in Python). If you get an indent error when you run the script, that only means that the indentation of your script is not consistent. Read a little bit about indentation in Python if my wording for the issue isn’t clear.
Note 2: You MUST run this as super-user.
#!/usr/bin/python3

import RPi.GPIO as GPIO
import time

GPIO.setmode(GPIO.BCM)

#The following is a function that inverts the current pin value and saves the new state
def switchPortState(portMapElement):
    GPIO.output(portMapElement[0],not portMapElement[1])
    pe = [portMapElement[0],not portMapElement[1]]
    return pe


#There's no easy way to know the current binary state of a pin (on/off, or 1/0, or True/False), so I use this structure, which is a dictionary array that goes from up to the number of channels one wants to control (I used GPIO channels 2,3,5,6). The first element of each element is the GPIO port number, and the second element is the assumed initial condition. The latter will invert in each step as in the video
portMap = {}
portMap[0] = [2,False]
portMap[1] = [3,False]
portMap[2] = [5,False]
portMap[3] = [6,False]

for i in range(len(portMap)):
    GPIO.setup(portMap[i][0], GPIO.OUT)

while True:
    for i in range(len(portMap)):
    portMap[i] = switchPortState(portMap[i])
    time.sleep(0.5)
If you access your Raspberry Pi using SSH, then you can use “nano” as an easy text editor to paste this script. Say if you wanna call the script file “script.py”, then:
nano script.py
will open a text editor where you can paste this script. After you’re done, press Ctrl+X to exit and choose to save your script. Then make this script executable (linux thing), using:
chmod +x script.py
then run the script using
sudo ./script.py
This will start the script and the leds will flash every half a second.
Again, we’re using “sudo” because we can only control Raspberry Pi’s GPIO pins as super user. There are ways to avoid putting your password each time you wanna run this, which will be explained later.
Get a grasp on the concept of turning the computer on/off:
There are two ways to turn your computer on/off electronically without using the switch and without depending on the bios (LAN wake-up, etc…):
- If you’re lucky, the power button’s wires will be exposed and you can immediately make a new connection branch in the middle and lead it outside the computer. Shorting the wires is equivalent to pressing the power button.
- Use the power supply’s motherboard green wire. Shorting this wire to ground (to any black wire) will jump the computer and start it.
The following is a random picture for a computer power supply. A clip is used to short green with ground.
 I used the first way of the two ways I mentioned. Here’s a video showing how it looks like:
Connecting the power-wires to the Relay Module:
After learning how to control the Relay Module, and learning how to take a branch from the computer case that if you would short the computer starts, the remaining part is to connect the power-wires, that you got from your computer power button or green+black power supply cords, and connect them to the Relay Module. The following video shows the concept and the result.
Important: One important thing to keep in mind when doing the wire connection to the Relay Module, is that we need to connect them in a way that does not trigger the power switch if the Raspberry Pi is restarted. Therefore, choose the terminal connections to be disconnected by default, as the following picture shows:
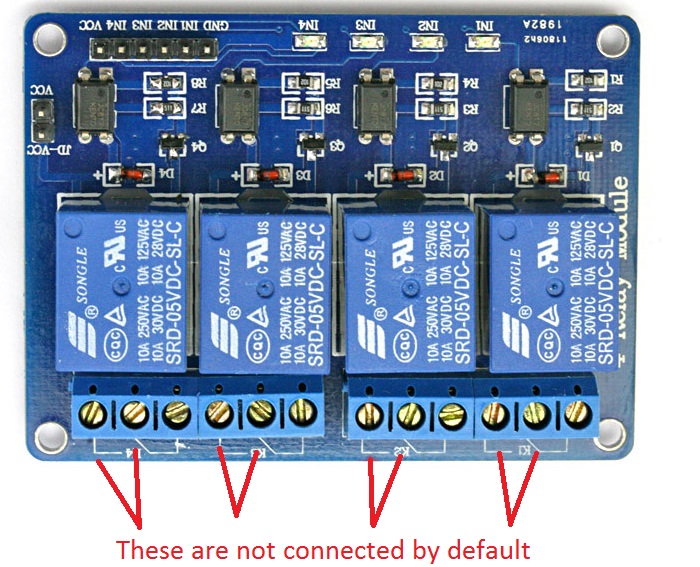
Connect your power-wires two terminals to any of the marked two in the picture. The way the Relay Module works is that when it’s turned off, it switches whether the middle terminal is connected to left or right. By default it’s connected to right, and that’s what we can see in the small schematic under the terminals.
After doing the connections properly, now you can use the following script turn your computer on:
#!/usr/bin/python3

import RPi.GPIO as GPIO
import time
import argparse

#initialize GPIO pins
GPIO.setmode(GPIO.BCM)

#use command line arguments parser to decide whether switching should be long or short
#The default port I use here is 6. You can change it to whatever you're using to control your computer.
parser = argparse.ArgumentParser()
parser.add_argument("-port", "--portnumber", dest = "port", default = "6", help="Port number on GPIO of Raspberry Pi")
#This option can be either long or short. Short is for normal computer turning on and off, and long is for if the computer froze.
parser.add_argument("-len","--len", dest = "length", default = "short" , help = "Length of the switching, long or short")

args = parser.parse_args()

#initialize the port that you'll use
GPIO.setup(int(args.port), GPIO.OUT)


#switch relay state, wait some time (long or short) then switch it back. This acts like pressing the switch button.
GPIO.output(int(args.port),False)
if args.length == "long":
    time.sleep(8)
elif args.length == "short":
    time.sleep(0.5)
else:
    print("Error: parameter -len can be only long or short")
GPIO.output(int(args.port),True)
Save this script as, say, “switch.py”, and make it executable as we did before:
chmod +x switch.py
Now you can test running this script, and this is supposed to start your computer!
sudo ./switch.py
Running the program from a web browser
You could be already satisfied by accessing switching the computer remotely using ssh, but I made the process a little bit fancier using a php webpage.
CAVEAT:
Here, I explain how you could get the job done to have a webpage that turns on/off your computer. I don’t focus on security. Be careful not to make your home/work network’s components accessible to the public. Please consult some expert to verify that what you’re doing is acceptable and does not create a security threat for others’ data.
Using superuser’s sudo without having to put the password everytime
In order to access this from the web, you have to change pins states without having to enter the password.
To do this, run the command
sudo visudo
This will open a text editor. If your username for Raspberry Pi’s linux is myuser, then add the following lines there in that file:
www-data ALL=(myuser) NOPASSWD: ALL
myuser ALL=(ALL) NOPASSWD: ALL
This will allow the Apache user to execute the sudo command as you, and you have absolute super-user power. Now notice that this is not the best solution from a security point of view, but it just works. The best solution is to allow the user www-data to run a specific command as root. Just replace the last “ALL” of www-data with a comma separated list of the commands you wanna allow www-data to run, and replace “myuser” between the parenthesis with “root”. I recommend you do that after having succeeded, to minimize the possible mistakes you could do. This is a legitimate development technique, we start with something less perfect, test it, then perfect it one piece at a time.
Installing Apache web-server
First, install the web-server on your Raspberry Pi. Do this by running this set of commands in your terminal:
sudo apt-get install apache2
sudo apt-get install php5
sudo apt-get install libapache2-mod-php5
sudo a2enmod php5
sudo a2enmod alias
sudo service apache2 restart
I hope I haven’t forgotten any more necessary components, but there are, too, many tutorials out there and forums discussing how to start an apache webserver.
If the apache installation is a success, then you could go to your web-browser and see whether it’s working. First, get the hostname of your Raspberry Pi by running this command in Raspberry Pi’s terminal
hostname
Let’s say your hostname is “myhostname”. Now go to your browser, and enter this address:
http://myhostname/
If this gives you a webpage, then the web-server is working fine and you can proceed. Otherwise, if the browser gives an error, you have to debug your web-server and get it working. Please consult some tutorial online to help you run the apache server.
Creating the webpage:
The default directory where the main webpage is stored in apache is either “/var/www/” or “/var/www/html/”. Check where the index.html that you saw is, and place the new php file there. Say that php file has the name “control.php”, and say the default directory is “/var/www/”. Then, go to that directory using
cd /var/www/
Now create the new php page using the command
sudo nano control.php
And use the script
<!DOCTYPE html>
<html>
<head>
<title>Control page</title>
</head>
<body>
<form action="#" method="post">
 <center>
 <select name="switchlen">
 <option value="short">Short</option>
 <option value="long">Long</option>
 </select>
 <input type="submit" value="Switch server" name="submit">
 </center>
</form>

<?php
if(isset($_POST['submit']))
{
 if($_POST['switchlen'] == "long")
 {
 echo("This is long");
 echo("<br>");
 $command = "sudo -u myuser sudo /usr/bin/python3 /home/myuser/switch.py -len long > debug.log 2>&1";
 }
 else if($_POST['switchlen'] == "short")
 {
 echo("This is short");
 echo("<br>");
 $command = "sudo -u myuser sudo /usr/bin/python3 /home/myuser/switch.py -len short > debug.log 2>&1";
 }
 $output = shell_exec($command);
 echo("Script return: ");
 var_dump($output);
}
?>
</body>
</html>
Don’t forget to change the path of the script to the correct path of your script “switch.py”, and change “myuser” to the username you’re using in your Raspberry Pi. After you’re done, press Ctrl+X to save and exit.
To use this page and have it successfully run the script, you have to do one more thing, which is making apache’s user own this file. The username for the apache web-server is called “www-data”, so assuming you called the file “control.php”, you have to run this command:
sudo chown www-data:www-data control.php
After you run this command, you should use “sudo nano” to edit this file instead of only nano, since your linux user doesn’t own the file anymore.
Also, don’t save the file in any place other than the original folder of apache (like /var/www), at least not before you make sure it works. Adding new folders that apache recognizes is something that requires additional steps that I don’t discuss here. Please consult an apache tutorial for that.
To test the new php page, go to the link:
http://myhostname/control.php
If the website doesn’t work, check the the file “debug.log” in the same path of control.php. It will tell you what was wrong in the script.
Controlling your computer from outside your home
If you’re in a home network, then you can only access that webpage from within the network. If you would like to access it from outside the network, you have to have VPN access to your home network. Consider achieving this using OpenVPN. That’s how I do it. I may write an article about it some time in the future.
Conclusion
I hope this article has given you an idea on how to control your appliances using Raspberry Pi. We have shown how to turn a computer on/off remotely.
I do this for fun, but also more professional tasks can be achieved using similar scripts, such as controlling scientific experiments.