
Qt Creator… the best IDE for developing C and C++ I’ve ever seen in my life. Since I like it that much, I’m sharing some of what I know about it.
DISCLAIMER: I’m not a lawyer, so don’t hold me liable for anything I say here about licensing. Anything you do is your own responsibility.
What does using Qt Creator without Qt mean?
It simply means that you don’t have to install or use the Qt libraries, including qmake. There are many reasons why that may be the case:
- You may have an issue with licensing since qmake is LGPL licensed
- You may not have the possibility to install qmake alone without its whole gear, as is the case in Windows
- You may not want to compile the whole Qt libraries if the pre-compiled versions that work with your compiler is not available
While I love Qt and use it all the time, I follow the principle of decoupling my projects from libraries if I don’t use them. But since I love Qt Creator, I still want to use it! Reasons will become clear below.
What are the ingredients of this recipe?
- Qt Creator
- CMake
- A compiler (gcc, MinGW or Visual Studio, or anything else)
You don’t need to download the whole Qt SDK. Just Qt Creator. It’s about 90 MB.
Basic steps
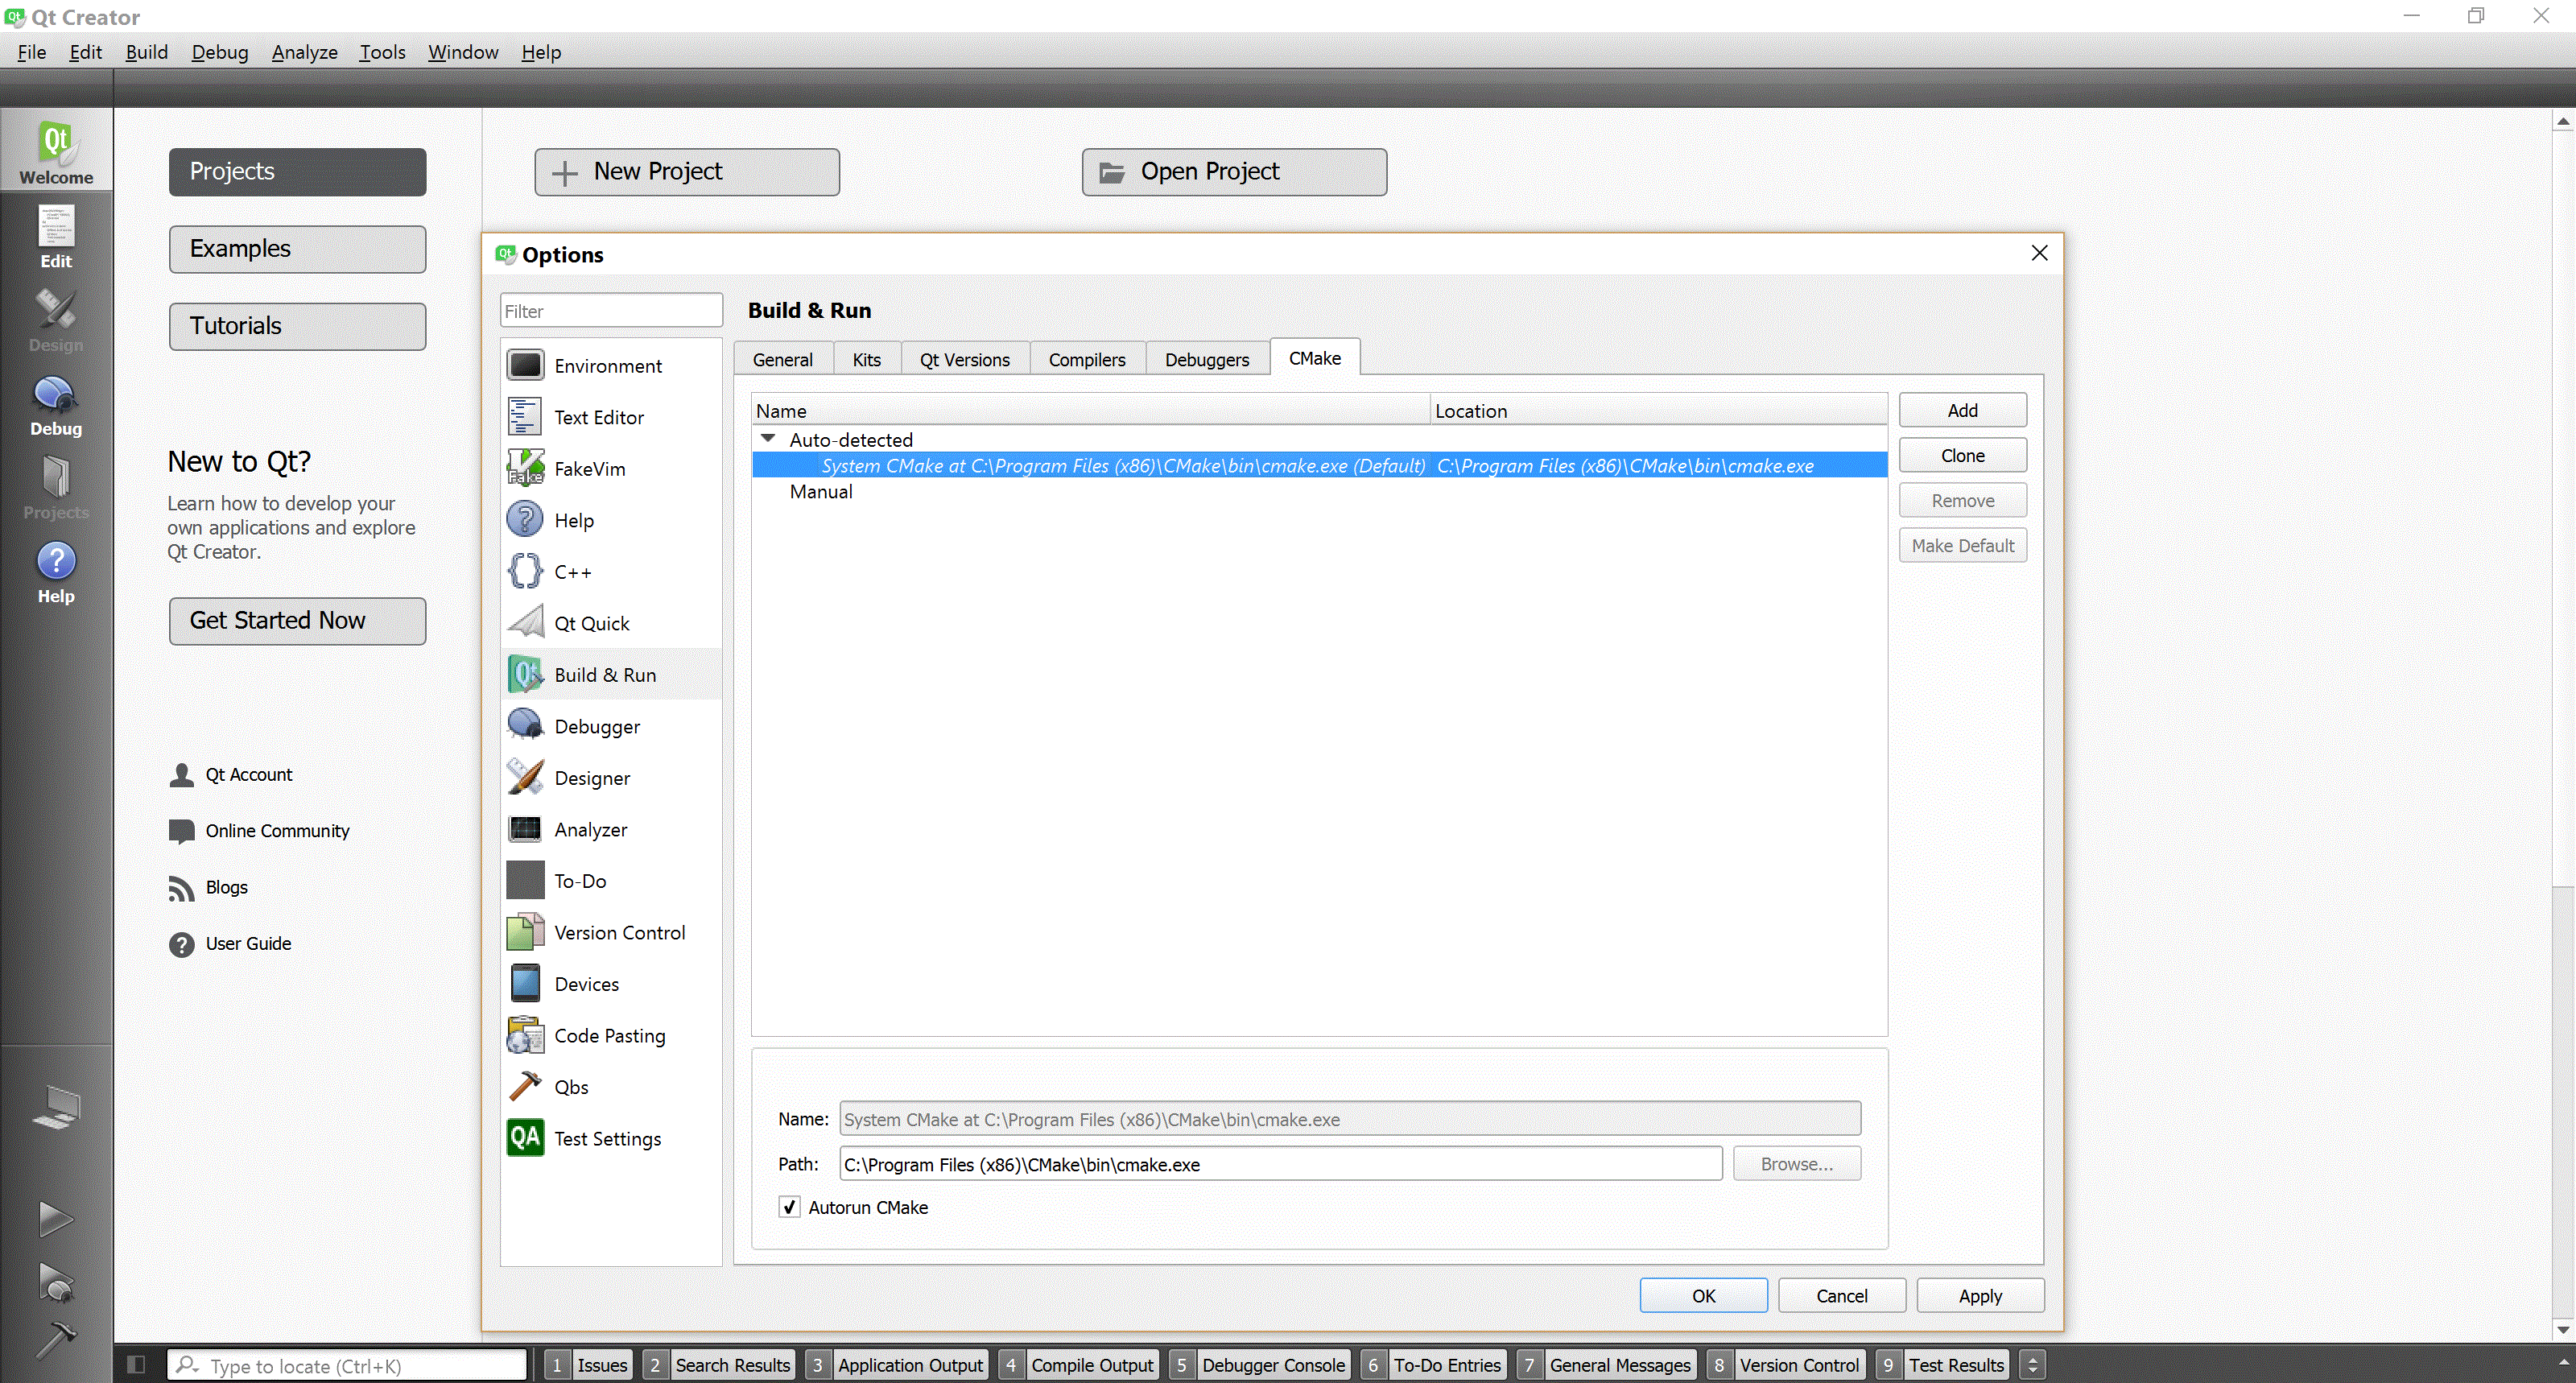
After installing the 3 ingredients, make sure that Qt Creator recognized that CMake exists on the computer. The next picture (click on it to magnify it) is how it looks like if CMake was found. If it doesn’t find CMake, on Windows, most likely the reason is that you chose in the installation not to add CMake to the system’s PATH. Eventually, you can just add it manually if it can’t be found automatically.
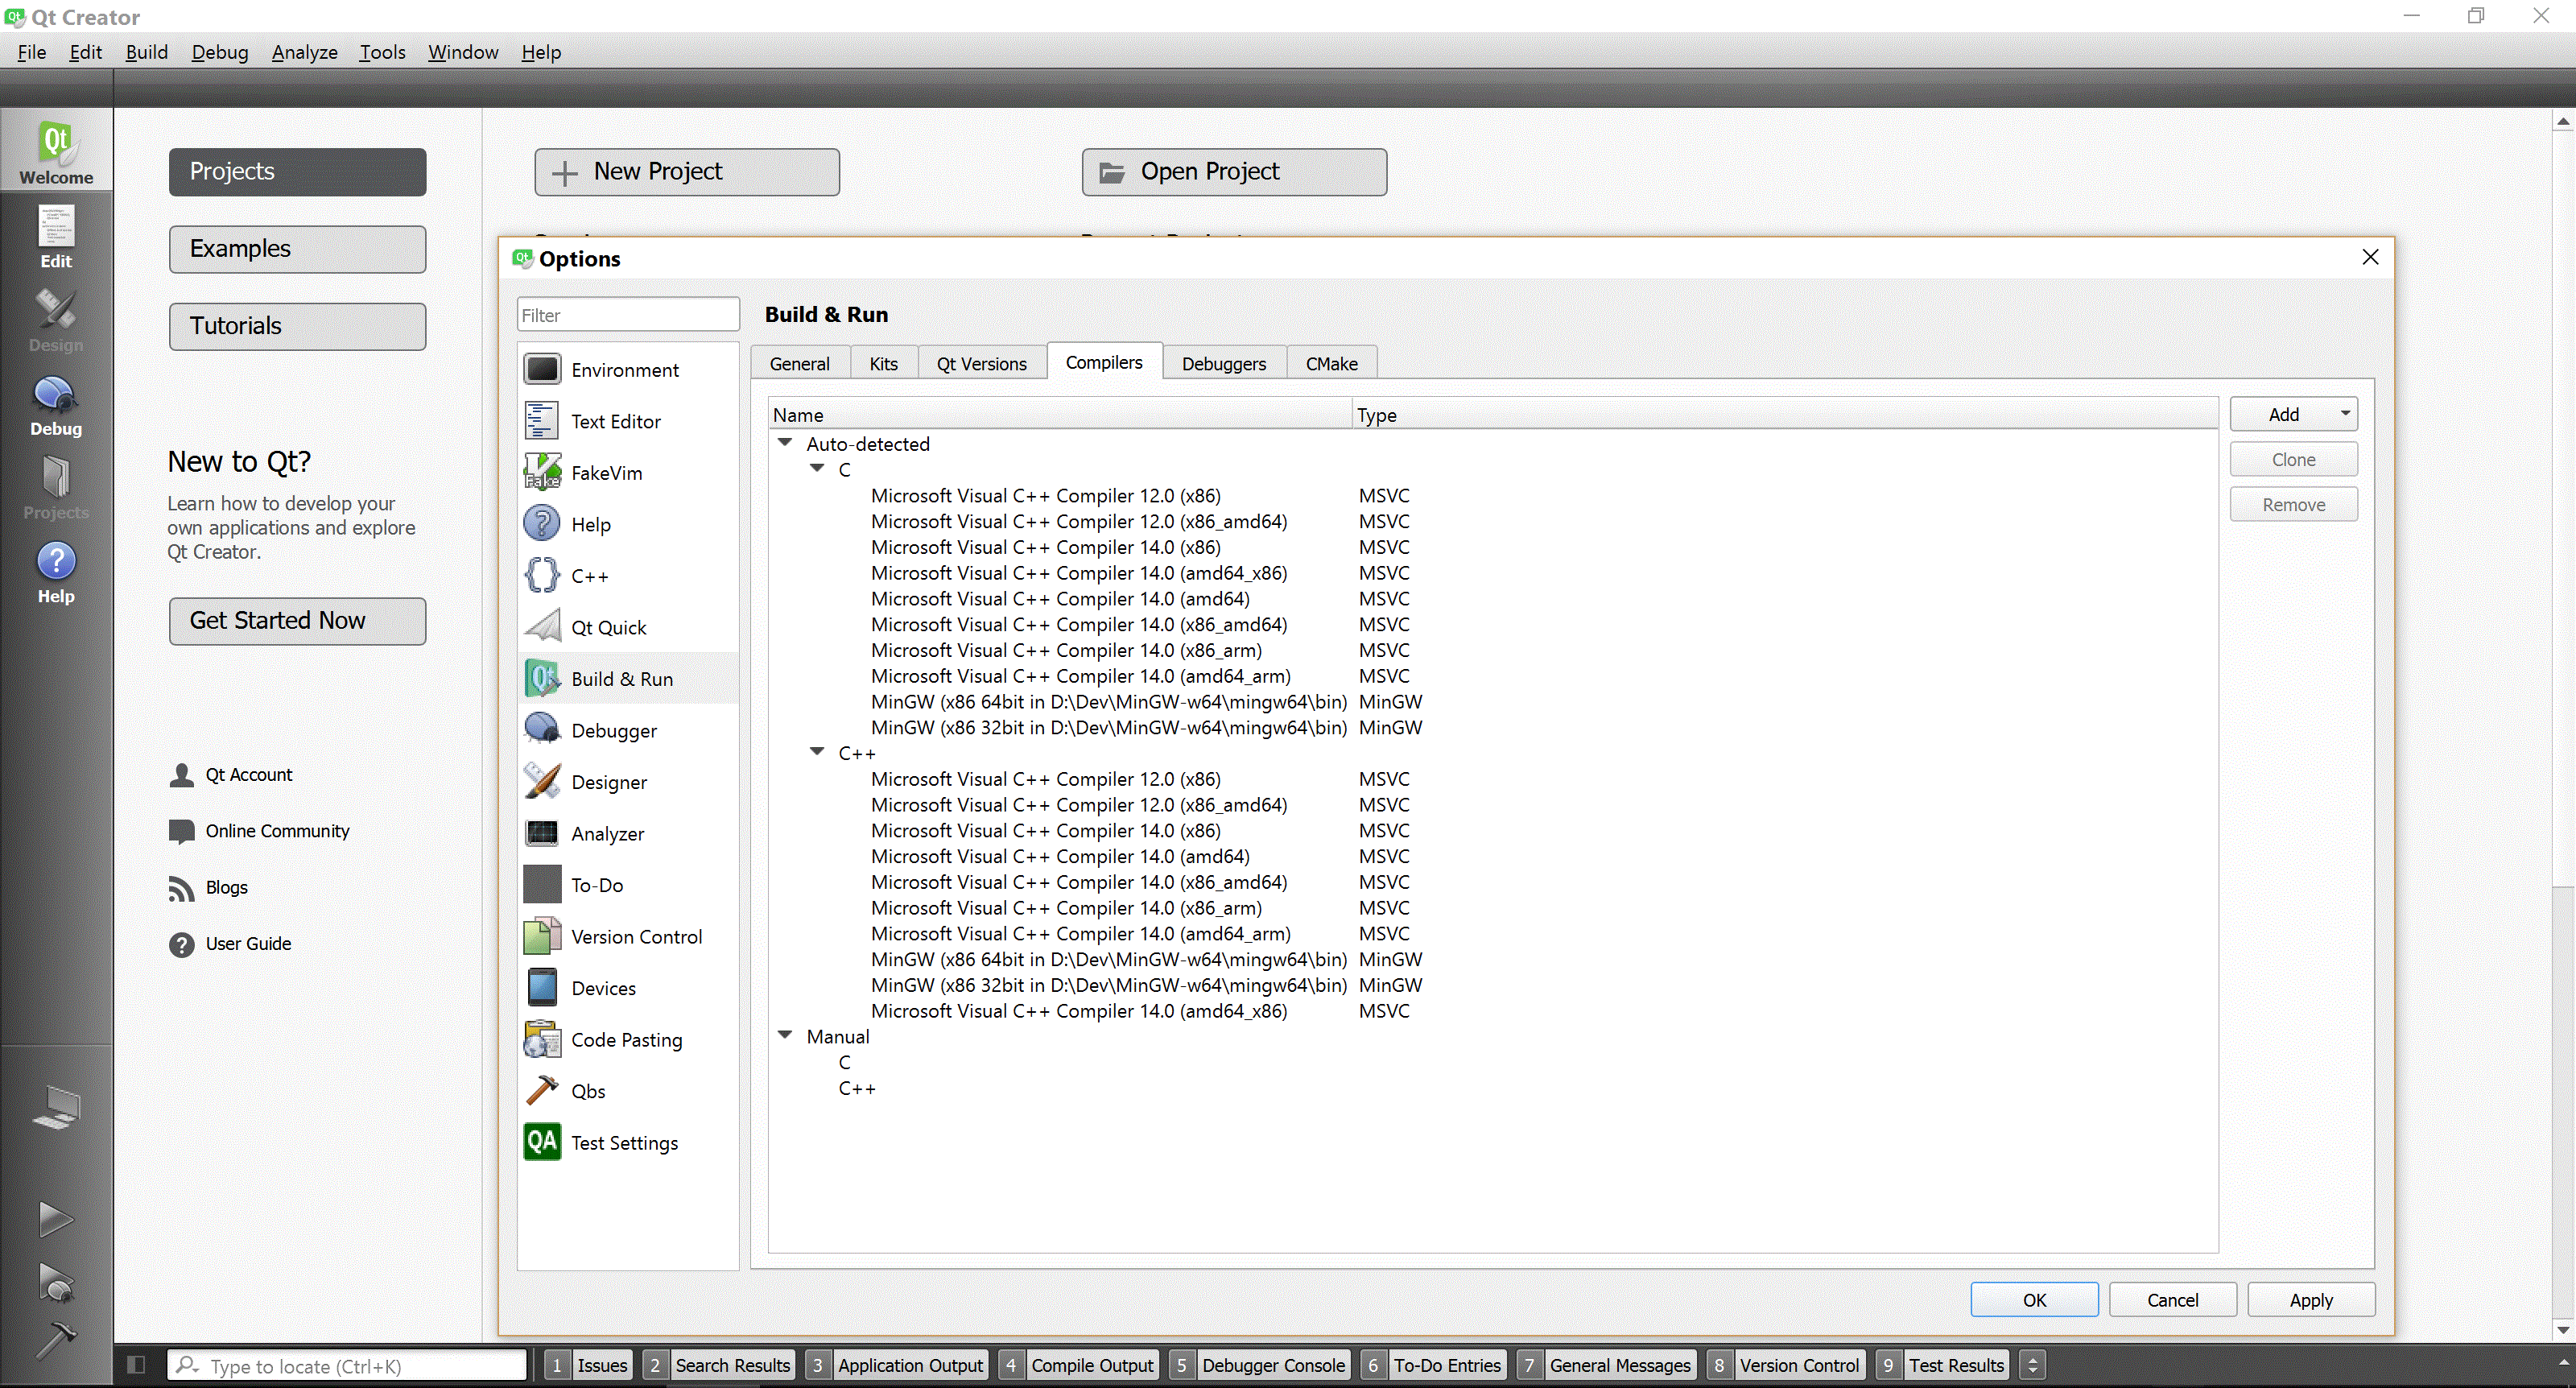
Next, make sure that Qt recognizes the compiler and the debugger as you see in the next pictures. Again, you can add them manually.
For Visual Studio to be found automatically, I guess the environment variable VS140COMNTOOLS has to be defined. “140” is version 14 of Visual Studio, which is the version number of Visual Studio 2015. It’s defined by default when Visual Studio is installed. For MinGW to be detected automatically, the bin of MinGW has to be in PATH.

Adding the complete tool-chain/kit
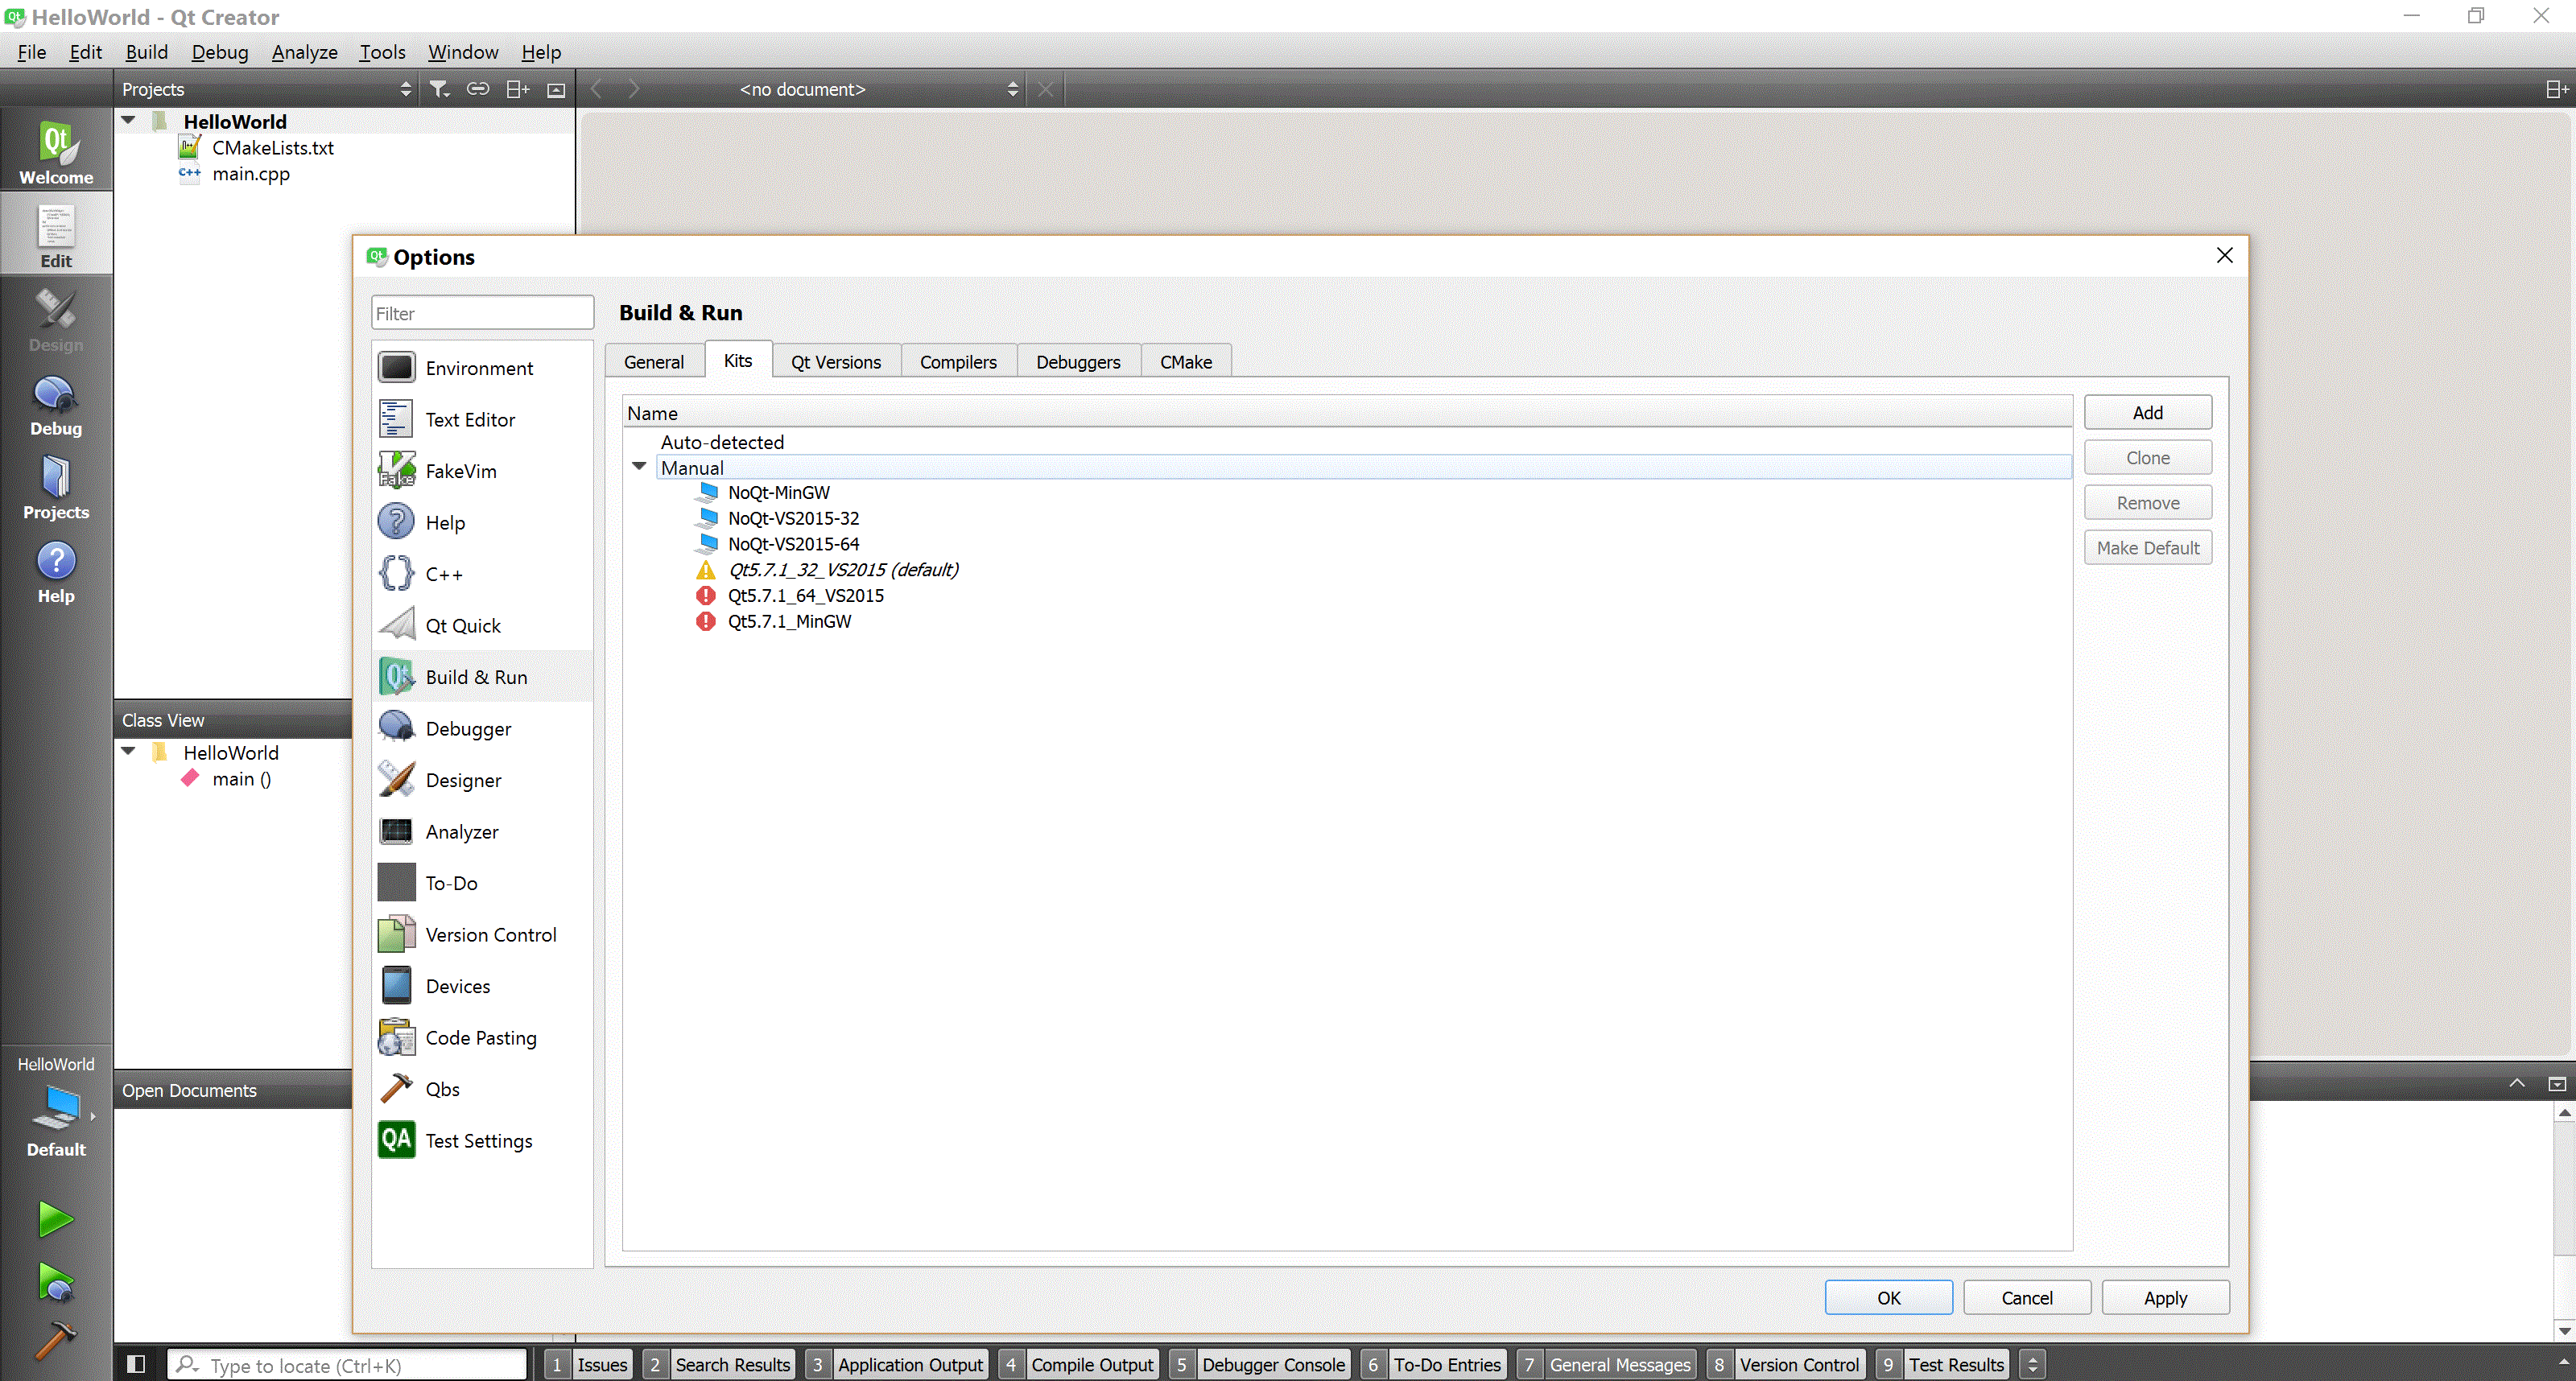
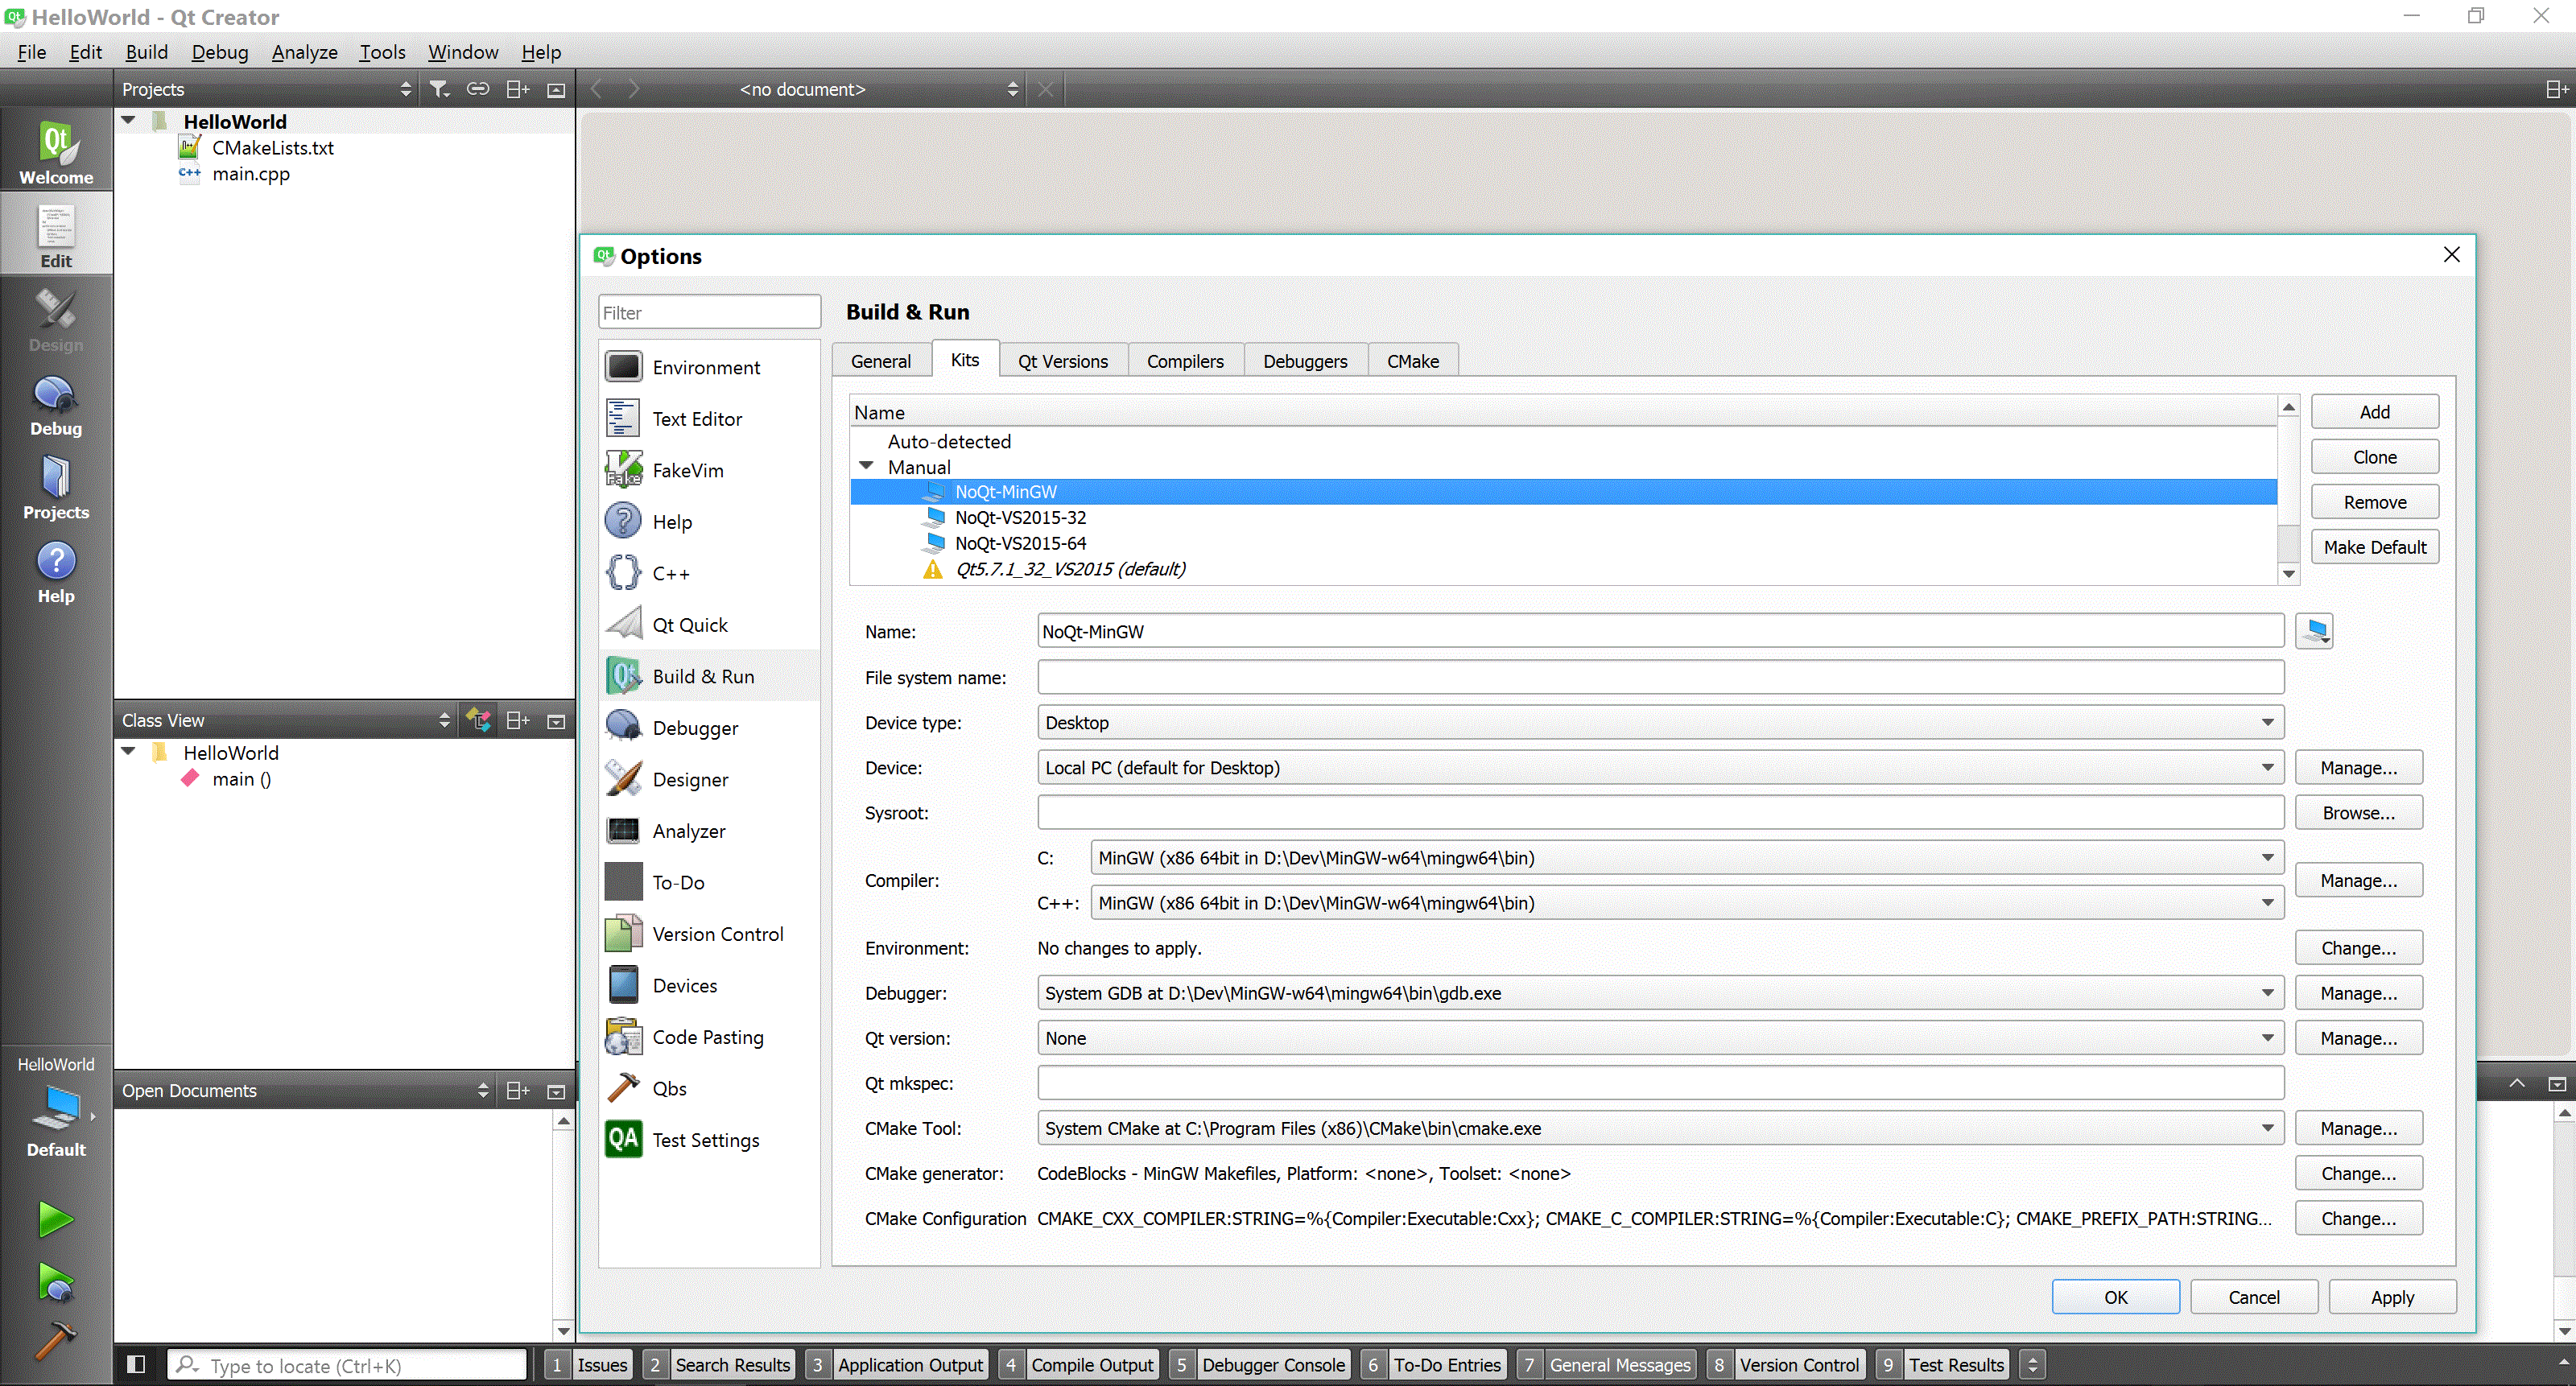
Go to the “Kits” tab. If you have Qt libraries installed and configured, you’ll see them there. I don’t like Qt SDK, and I usually compile my own versions of Qt. You’ll see that in the next screenshot.
What you see in the next screenshot are 3 kits that use Qt libraries, and another that do not. The free version of Visual Studio (2012 and later) comes with both 32-bit and 64-bit compilers. You can choose any one of them, or both (like I do). I don’t use MinGW often on Windows, so I install only 1 version of it (I use MinGW on Windows primarily because it offers the “-pedantic" flag, which gives the chance to experiment with C++ standard-approved features).
Now click “Add”, and choose the fields as shown below (most importantly, configure CMake correctly, it’s a little tricky, and the error on Qt Creator doesn’t tell you what you did wrong)
If you’re getting unexplained errors when running CMake, follow the following instructions carefully
Visual Studio
The following is a screenshot of how Visual Studio configuration should look like (screenshot is for 64-bit)
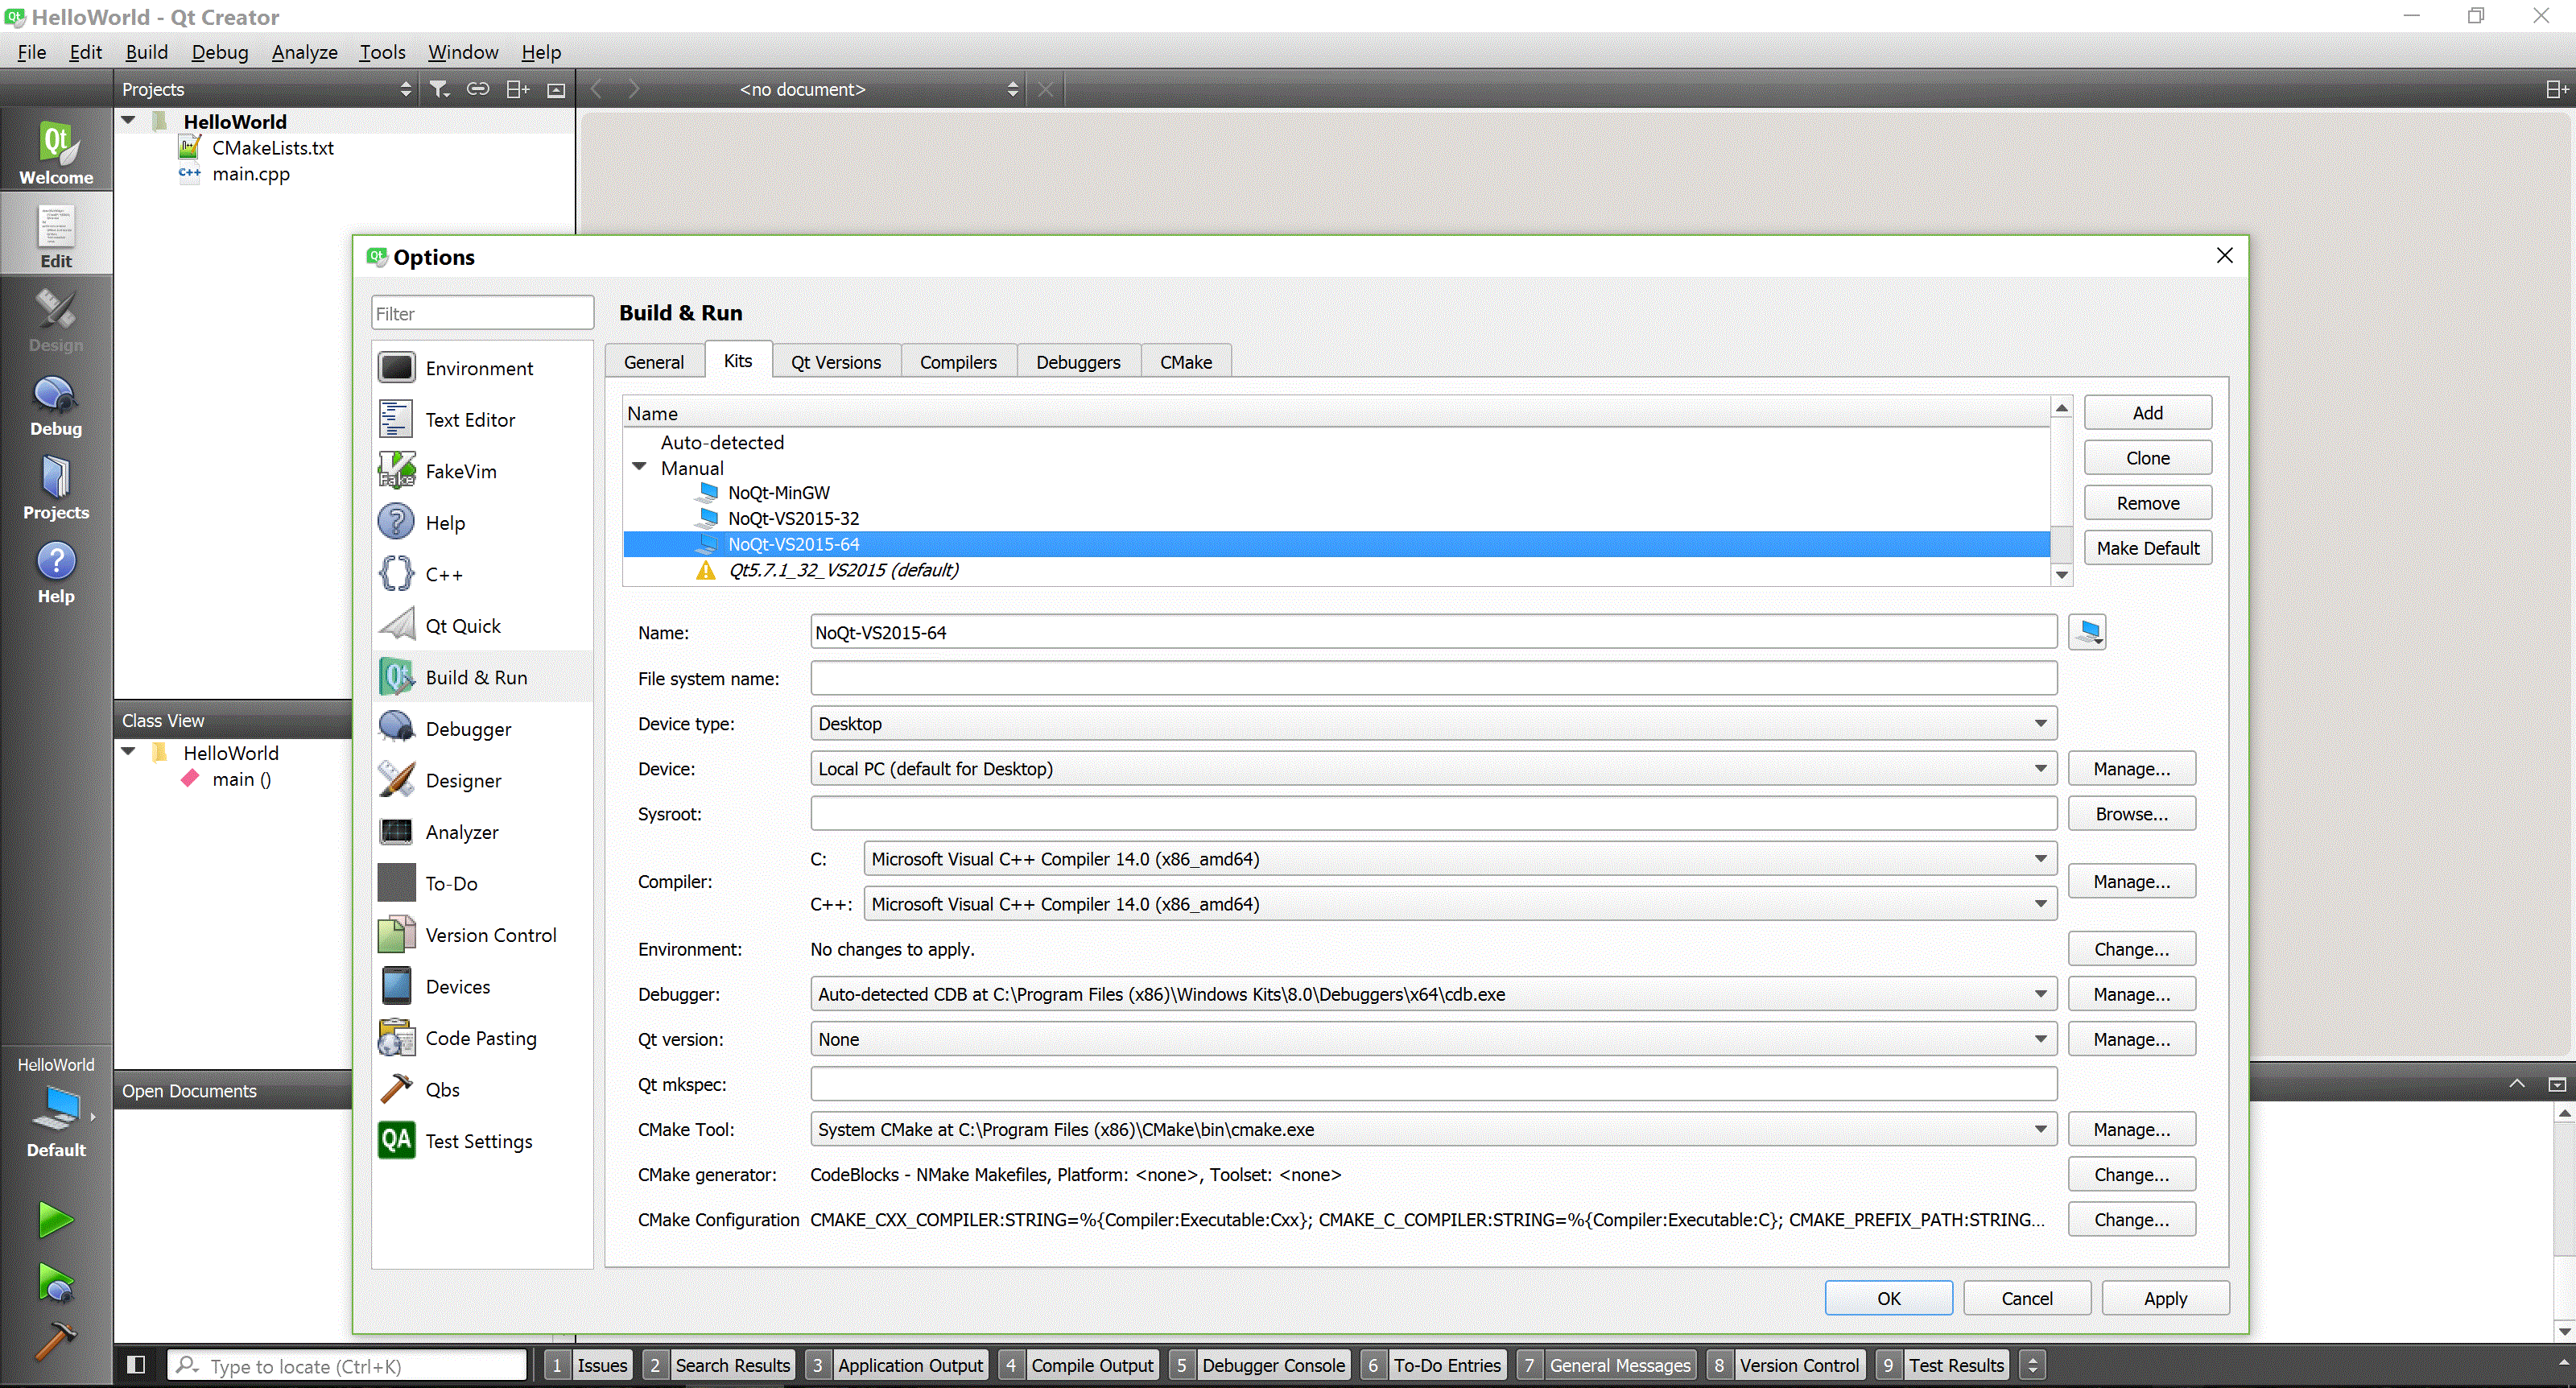
Set the following
- For the 32-bit compiler: Choose the compiler with (x86)
- For the 64-bit compiler: Choose the compiler with (x86_am64) or (amd64)
- Choose “None” for Qt version
- Choose the correct debugger
- Most importantly: After choosing CMake from the drop-down list, make sure that
CMake generatoris chosen to be “NMake Makefiles”, and theExtra generatorto be CodeBlocks
The last piece of information is the invitation to all kinds of problems. If running CMake doesn’t work, you most likely configured that part incorrectly.
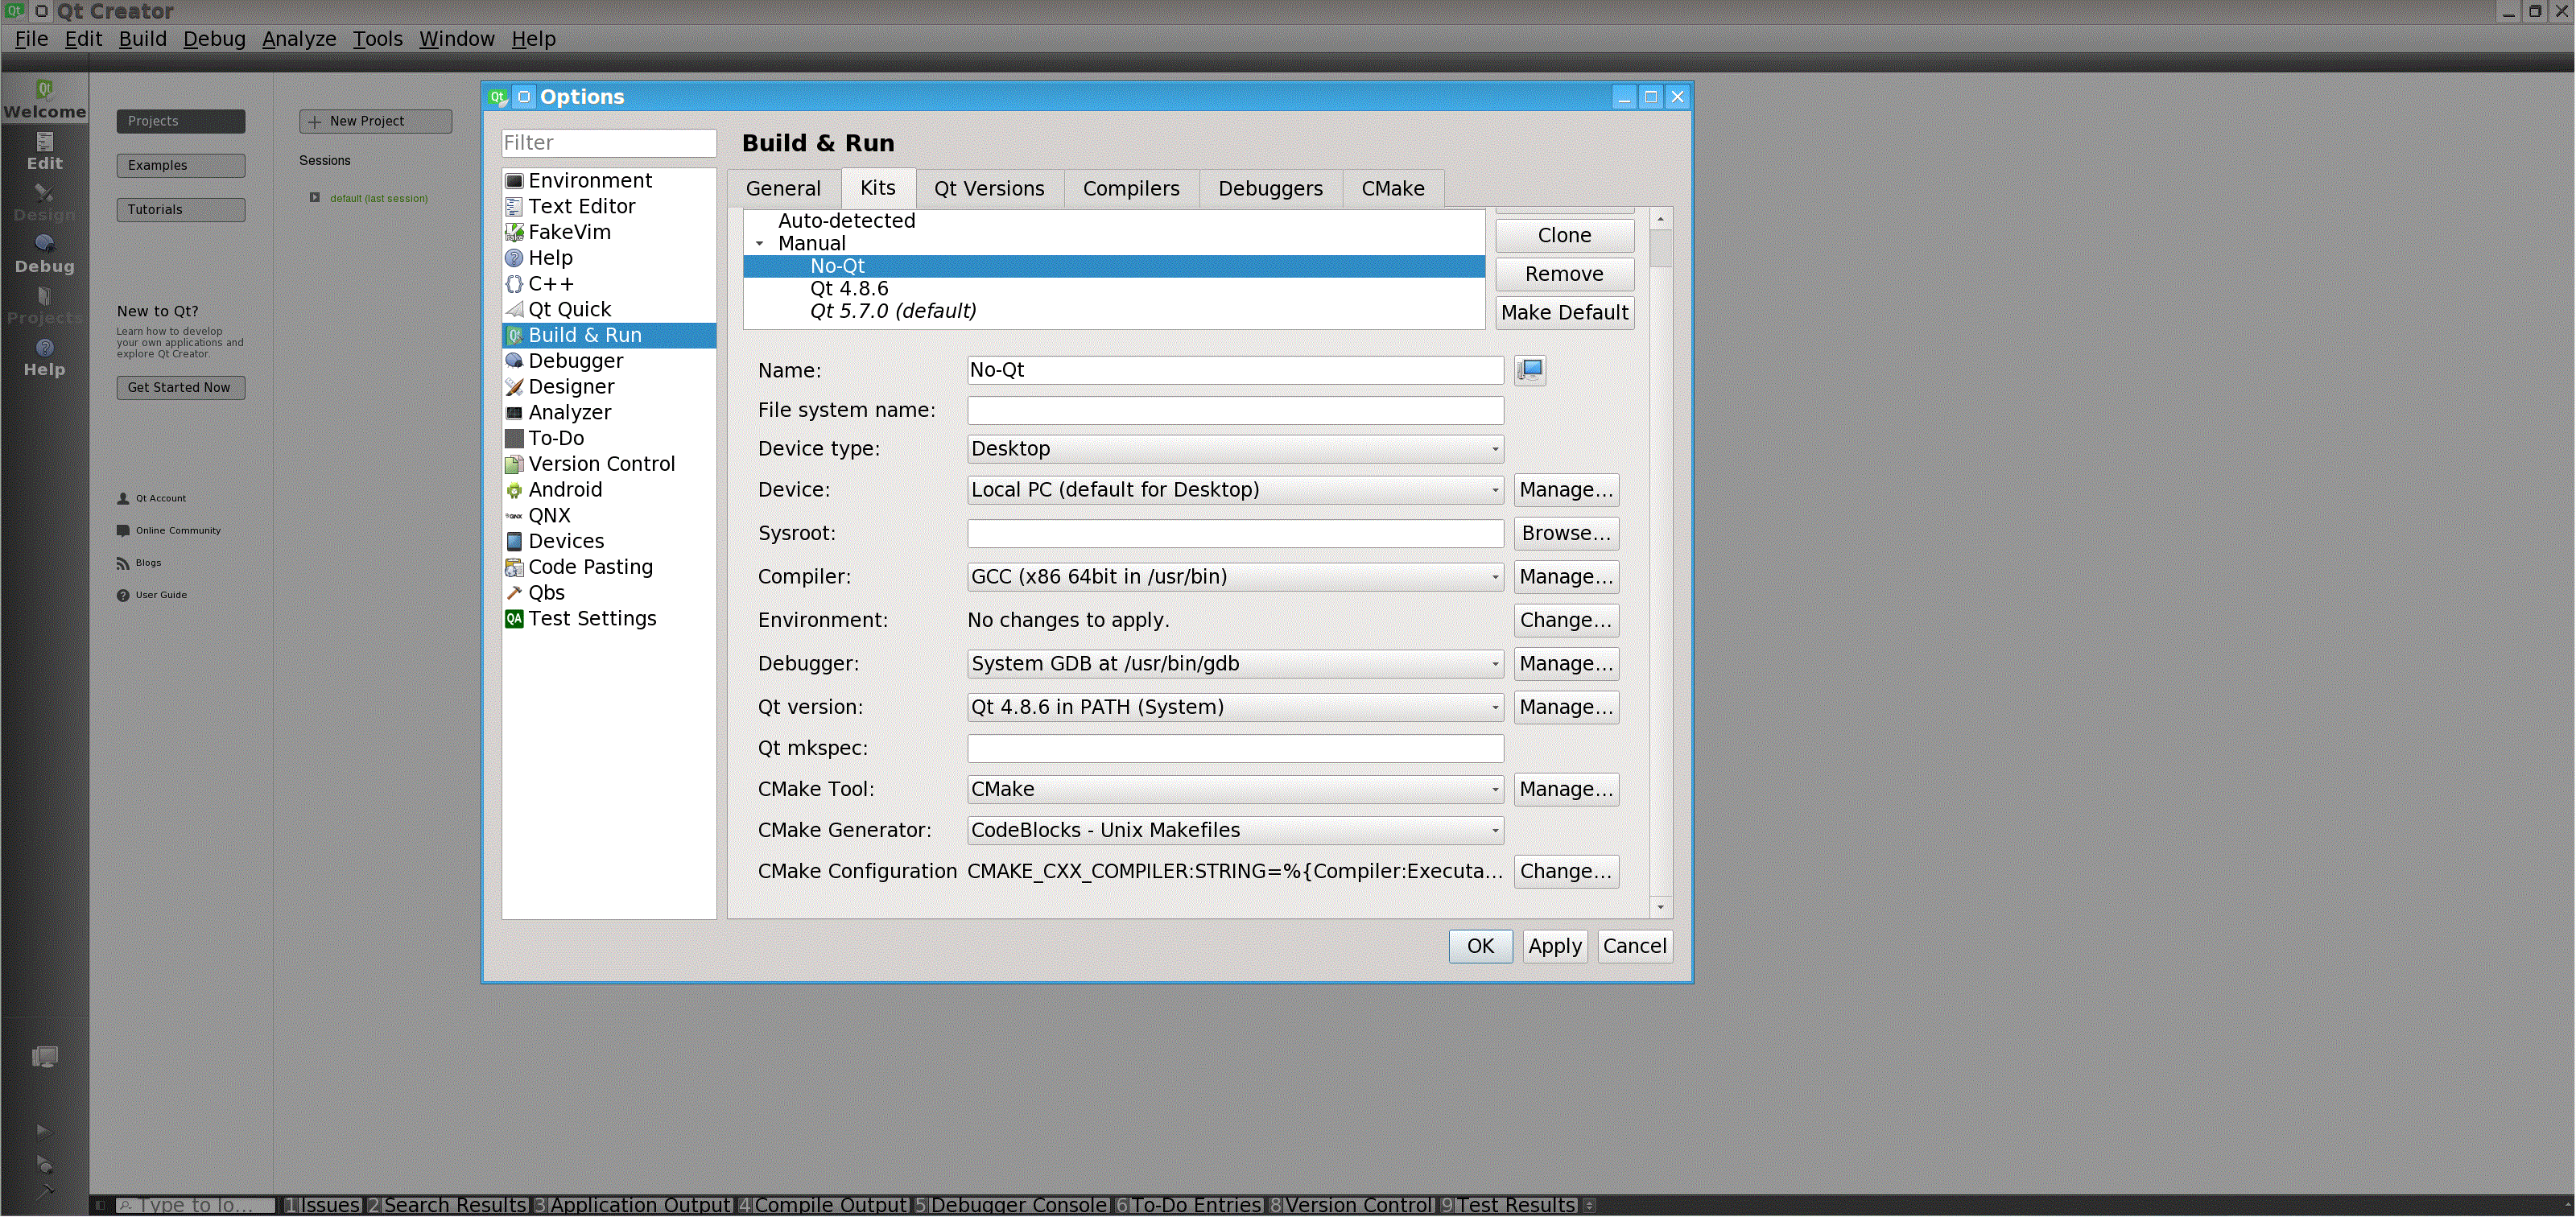
MinGW
The following is a screenshot of how MinGW configuration should look like:
- Choose “None” for Qt version
- Choose the correct debugger
- Most importantly: After choosing CMake from the drop-down list, make sure that
CMake generatoris chosen to be “MinGW Makefiles”, and theExtra generatorto be CodeBlocks
The last piece of information is the invitation to all kinds of problems. If running CMake doesn’t work, you most likely configured that part incorrectly.
I have to say that from my experience, Qt Creator some times fails to run CMake with MinGW with no good reason. I fix this by switching the “Extra generator” to “CodeLite”, and back to “CodeBlocks”. I’m currently using Qt Creator 4.2.0. It might be a bug?
gcc/g++
It’s very easy to get gcc/g++ to work. The following is a screenshot:
- Choose “None” for Qt version
- Most importantly: After choosing CMake from the drop-down list, make sure that
CMake generatoris chosen to be “CodeBlocks – Unix Makefiles”. It’s chosen by default, so nothing to worry about.
And you’re done!
What can I do with CMake + Qt Creator?
No ultimate dependence on Qt Creator!
Visual Studio solutions don’t work without Visual Studio. Netbeans configuration is stored in “netbeans project directory”. it’s very annoying that every IDE has its own weird format! I never stop hearing people complaining about porting their programs to other systems and having problems because of this.
One of the things I like most about Qt Creator is the fact that it doesn’t have any special project files for itself. The Makefile itself (CMake file, in this case, or qmake otherwise) is the project file. This ensures not only 100% portability (since both make systems are cross-platform) but also independence of Qt Creator itself. In the future, if the whole Qt Creator project goes down, your project won’t be affected at all.
What if I want to use Qt Creator just as an IDE without having to build a project through it?
I had the “luxury” of getting a project from a space agency to add some features to it, where they had their own build system. I wasn’t able to use Qt Creator to build the project, but…
But why use Qt Creator? Simply because you’ll get
- Syntax highlighting
- target functions and classes following
- advanced refactoring options (like renaming classes, functions, etc)
- Search capabilities in source files.
- Repository updates checking
- Type hierarchy navigation with a click
- And lots more!
With all these, yet, while the project contains a few thousand source files, I was able to add *all* files and parse them with Qt using a few CMake lines. And it was fast enough to handle all that!
How to do it? How to add all these files in one step?
CMake supports recursive adding of source files. Consider the following CMake file (always called CMakeLists.txt):
cmake_minimum_required(VERSION 3.0)
PROJECT(MyProject)

file(GLOB_RECURSE MySrcFiles
 "${CMAKE_SOURCE_DIR}/src/*.cpp"
 "${CMAKE_SOURCE_DIR}/src/*.h"
 )

add_library(MySrcFilesLib
 ${MySrcFiles}
 )

add_executable(MyExecutable main.cpp)

target_link_libraries(MyExecutable MySrcFilesLib)
The first two lines are obvious. The “file" part recursively finds all the files under the directory mentioned and saves them in the variable ${MySrcFiles}. The variable ${CMAKE_SOURCE_DIR} is basically the directory where you cmake file “CMakeLists.txt" is located. Feel free to set any directory you find fit.
The “add_library” part creates a library from the source (and header) files saved in ${MySrcFiles}.
The “add_executable” part “creates” the executable, which is then linked to the libraries you added.
That last linking part is not necessary if you don’t want to build in Qt Creator.
With such a simple CMake file, Qt Creator was smart enough to add all the source files, parse them, and give me all the functionality I needed to edit that project successfully.